How to Grow Vanilla Orchid Indoors: 10 Fun Facts
Before I go into how to grow the vanilla orchid, here are some fascinating facts about this extraordinary, commercially valuable plant.
How To Grow Vanilla Beans: The Vanilla Orchid
The vanilla orchid is beautiful, but do you know how to grow vanilla beans from that lovely plant? We delve into this complex topic!
By Sarah Jay Last updated: June 22, 2023 | 8 min read

One of the most beloved flavors in the world is vanilla. Vanilla extract is essential for baking, and it’s a lovely flavor for most confections. This leaves a lot of gardeners wondering how to grow vanilla at home. Vanilla bean plants are lovely climbing orchids that host vanilla beans with patience.
But growing vanilla bean plants isn’t as simple as planting seeds and watching them take off. A vanilla orchid has specific needs, based on the native habitat of vanilla orchids altogether. You may already have some idea of what growing orchids is like, but don’t let that discourage you!
It’s possible to grow a vanilla bean plant in a controlled environment. With so many different types, you can have vanilla flavoring of many kinds. Your own vanilla seed pods will taste that much better when you’ve done the planning and work of caring for a vanilla bean orchid. Let’s cover caring for vanilla plants, and the different varieties out there. You’ll be on your way to growing your own vanilla pods in no time.
Good Products At Amazon For Growing Vanilla:
- SuperMoss Orchid Bark
- Neem Bliss 100% Cold Pressed Neem Oil
- All Seasons Horticultural And Dormant Spray Oil
Quick Care Guide

| Common Name(s) | Vanilla, vanilla orchid, flat-leaf vanilla, West Indian vanilla |
| Scientific Name | Vanilla planifolia or Vanilla tahitensis |
| Days to Harvest | 180 to 270 days |
| Light | Indirect sunlight |
| Water | Consistent, light |
| Soil | Combo bark, peat moss, well-draining |
| Fertilizer | High nitrogen when active, full-spectrum balanced when dormant |
| Pests | Spider mites, mealybugs |
| Diseases | Root rot, stem rot |
All About Vanilla

This piece covers the two most popular cultivars of vanilla plants: Vanilla planifolia and Vanilla tahitensis. These are commonly referred to as Vanilla, vanilla orchid, flat-leaf vanilla, or West Indian vanilla. Vanilla tahitensis originates from southern North America where Aztec peoples hybridized two varieties into one. Vanilla planifolia is native to Guatemala, Mexico, and Belize. Both were transferred to Europe via Spanish conquistadors in the years 1300-1500.
These are vines that use trees for support. They grow in a tropical climate under rainforest lower canopies. The vines zig-zag and have elliptic leaves. After a few years of vanilla vine growth, a greenish, yellow, or white flower forms. The flower lasts only one day. In this small window, self-fertile flowers pollinate. If no pollination occurs, the flowers drop.
As the climbing vine matures a few years and pollination is successful, the fruit begins to form. They first resemble small 6 to 9-inch bananas that take about 6 months to mature. Aged pods are harvested and cured for extraction. Usually, the entire pod is macerated and distilled in alcohol for flavoring. Some scrape the inside of the pod and use real vanilla to flavor all kinds of culinary confections.
Most of the plants used for growing vanilla extract come from Madagascar, Tahiti, and Mexico. It can only be cultivated in the wild at 10-20 degrees north and south of the equator. In captivity, it is necessary to hand pollinate.
Types of Vanilla
Here are a few of the varieties commonly cultivated by curious gardeners who are up for the challenge.
- West Indian Vanilla (Vanilla pompona): a lovely plant with large glossy green leaves and long thin stems up to 5 meters long. Native to Mexico, and South Tropical America. Bunches of fragrant flowers open in succession and produce long pods.
- Flat-leaved vanilla (Vanilla planifolia): one of the largest plants, this cultivar grows up to 30 meters. It prefers a swamp habitat or tropical environment.
- Tahitian Vanilla (Vanilla tahitensis): native to Tahiti, this vanilla bean plant has yellowish-green flowers that produce broader, more squat pods than West Indian. This is one of the most common vanilla bean plant cultivars, and the vanilla extract has a flavor distinct from other varieties.
- Leafless Vanilla (Vanilla aphylla): native to Southeast Asia, this vanilla bean plant has clusters of three to four flowers that bloom in spring and summer. Unlike other cultivars, leafless vanilla has no foliage. Flowers grow directly from internodes situated evenly on vines.
- Mexican Vanilla (Vanilla mexicana): this vanilla bean is native to Central Florida, Mexico, and areas of Central and South America. One of the most common varieties, it grows squat and short at less than 2 feet in length.
Planting Vanilla
Unless you live in a region where tropical conditions exist year-round, you’ll want to have a controlled environment for your vanilla plant. If you live in Southern Florida, the base of a tree in an area where there is bright filtered shade in the afternoon might work. In all other regions, plant vanilla plants in small pots with an orchid potting mix.
Make sure your orchid has a pole to climb or some kind of support system for upward mobility. The container and potting medium need adequate drainage, as orchids of this kind do not like to be waterlogged. Use a sanitized cutting implement, and remove ⅓ of the bottom roots. Then, plant the rest of the plant and add your stake, pole, or whatever you will use to train your vanilla plants.
Care

A vanilla plant can be tricky, so it’s important to know what is required in raising vanilla beans. Stick to the guide, and you’ll be harvesting vanilla beans in under a year!
Sun and Temperature
A vanilla plant needs indirect sunlight in the morning and evening, and bright filtered shade in the afternoon. Too much direct bright light burns the plant and causes damage to the roots. Experts agree that the south side of a greenhouse shaded by a large tree is a great option. Because the USDA hardiness zones are limited (10 and 11 only) make sure you have a carefully monitored and managed space for vanilla beans to grow.
Vanilla plants prefer a warm environment and don’t do well in temperatures outside the 75 to 85-degree range. Outside this range, leaves will yellow and drop, and the vines won’t produce beans. It’s possible to grow vanilla beans in a grow tent where a greenhouse isn’t accessible or possible. This may be a better option as it’s easier to control the climate in a grow tent.
Water and Humidity
This is probably the thing most people get wrong with members of the orchid family. They want the soil evenly moist, and they prefer high humidity and good air circulation. Let the top 2 to 3 inches dry out between regular watering. When the lovely orchids begin to bloom, allow the entire plant to dry out for a few weeks between watering. Vanilla beans need at least 85 percent humidity. You can achieve this via grow tent controls, or by misting your orchid with a spray bottle. A humidity tray below your orchid might help in greenhouses that don’t achieve the required ambient humidity. Even a humidifier can be a boon here. Vanilla beans need controlled, consistent humidity all year round.
Just as temperatures outside their range can kill them, so can a lack of humidity and overwatering. Likewise, use distilled water to provide irrigation rather than tap water. Water in the morning hours.
Soil
Vanilla beans need a mix of half orchid bark and half sphagnum peat moss. You could also use an entire pot of bark if you’d rather skip the moss or if it’s not available in your area. Use a mix and pot that is well-draining. Do not try to use a poorer quality potting mix, as this will kill your plant. Keep the pH between 6.6 and 7.5. Give your vine the right environment to grow in and you’ll harvest vanilla down the line.
Fertilizing
Vanilla beans appreciate a heavily-diluted high-nitrogen fertilizer weekly (30-10-10 NPK) when it is actively growing. Only add fertilizer when the soil is moist, as adding at the same time the bark is dry will damage the roots. When your orchid is dormant, lightly fertilize with heavily diluted orchid fertilizer (20-20-20 NPK). Remember to only fertilize your vanilla when the soil is moist, in between waterings, and do so in the spring and summer months, especially.
Pruning and Training
Unless you’re ready to propagate your vanilla plant, you shouldn’t need to prune. Train your vine with a pole covered in sphagnum moss, or up fences. Gently hang the vine on a nail attached to your training area if you don’t have a pole covered in moss.
Propagation
Propagation for this plant is via cuttings. Because the oils from the plant can burn skin, do this with gloves and long sleeves.
Cut pieces that are 6 to 8 inches long, and contain two to three nodes. Make sure there is ample stem at the base to push it down into the soil. Leave at least one inch above the top node. Put each cutting in the same type of potting medium and smaller space you have your original plant in. Add enough water to moisten the planting media and let them rest in an environment optimal for orchids. As a couple of inches of growth occurs at the top of the plant, take out the cuttings to look for roots. If there is ample root growth (3-5 inches of healthy white growth), congrats! You’ve successfully propagated vanilla orchids.
Pollination
As mentioned at the beginning of this piece, your vines must be hand-pollinated on the day they flower to produce beans. Use a chopstick or cotton swab to remove pollen from each flower in the morning hours. Then use the stick to add pollen to the female parts of the flower, which are hidden away under a flap. You’ll know if you were successful in just one day. The flower will wilt and stay on the vine. If it falls off, pollination did not occur. Within one week, green pods begin to form.
Harvesting and Storing

Here, we’ll cover the process of hand-pollination, harvesting, and storing your beans. We will also discuss how to sweat the beans and cure them for later use.
Harvesting
The pods will begin to turn yellow and elongate during their development, eventually turning a light brown color. In 6 to 9 months the pods turn dark brown. When they’ve reached dark brown, it’s time to harvest the beans.
Either let the beans mature on the plant, or remove them, blanch them, and cure them. Use a sharp sanitized implement to extract the pods, then blanch them in boiling water for a few minutes. Wrap them and place them in a cool dry location at night. Sun-dry them during the day. Repeat this for about a month, and then store your beans.
Storing
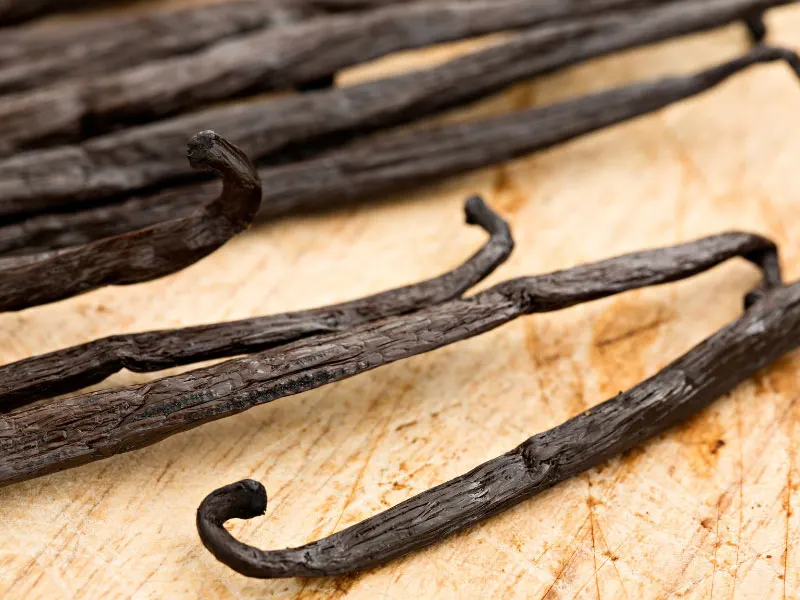
Cured dried beans (i.e. Madagascar vanilla beans) will keep in an airtight container indefinitely. You can also scrape out the insides of the pods to make vanilla paste. Store it in an airtight container at room temperature for up to three years. Do not freeze or refrigerate vanilla as this shortens its shelf life drastically. Infuse spent pods into alcohol or blend them into sugar for later use. Vanilla extract is easy to make too. Let the beans sit in vodka for at least 8 months, and voila! Vanilla extract. Homemade vanilla extract can’t be beat!
Troubleshooting

There are a few things to watch out for when you’re growing this plant. Keep this in mind, and you’re set!
Growing Problems
Most problems with this plant stem from over and under-watering, and a lack of proper humidity. Maintaining the humid but not soggy environment vanilla likes can be tricky!
Pests
The only two pests to look out for are spider mites and mealybugs. Both suck the sap from your plant. For mealybugs, use a cotton swab dipped in rubbing alcohol to force the white, fluffy bugs to release. Neem oil or horticultural oil can be applied for mites, but also are preventative against mealybugs.
Diseases
The only disease you have to worry about is rot. Overwatering causes fungal stem rot which may kill your plant. If you notice brown flimsy stems and overly saturated planting media, remove the entire plant, trim off the rotted parts, and transplant the cutting into new, dry media. Then add a little bit of moisture. Keep the air circulating and the media moist for rooting.
Frequently Asked Questions

Q: Can you grow vanilla at home?
A: Yes, in a controlled environment.
Q: How long does it take to grow vanilla?
A: At least a year.
Q: Is vanilla easy to grow?
A: Not exactly. But it’s very rewarding when you can help vanilla plants thrive, and even better when you can produce them.
How to Grow Vanilla Orchid Indoors: 10 Fun Facts

Did you know that the vanilla bean we use in cooking actually comes from an orchid and that you can grow this plant indoors? Vanilla planifolia, commonly known as the vanilla bean orchid, can be easily grown indoors in your home or in a greenhouse.
Keep reading to learn how to grow vanilla orchids indoors. I will share with you my personal experiences with the plant, and you will learn some other interesting tidbits as well.
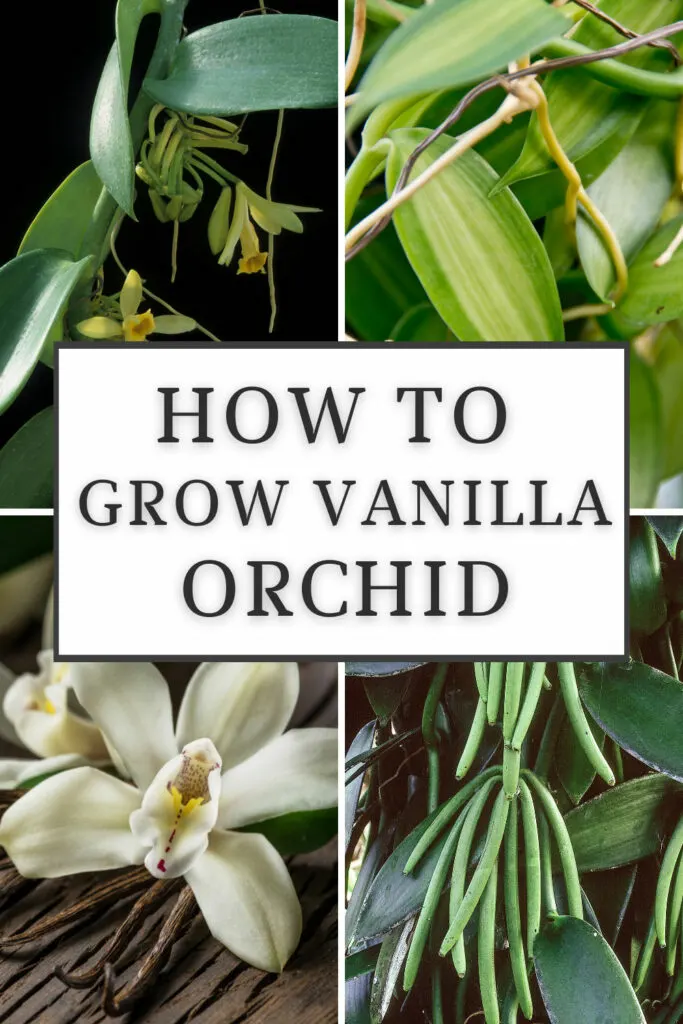
And with time, patience, and good care, you may even be able to grow your own vanilla beans!
Table of Contents
ABOUT VANILLA BEAN PLANTS
Before I go into how to grow the vanilla orchid, here are some fascinating facts about this extraordinary, commercially valuable plant.
- There are 119 accepted species of vanilla orchid, with V. planifolia being the primary source of natural vanilla flavoring.
- The plant is indeed a member of the orchid family, and its native habitat ranges from southern Mexico, through much of Central America and Brazil.
- Much of the world’s commercially grown vanilla comes from Madagascar and Indonesia, though it is also grown in China, Mexico and other countries.
- Vanilla is said to be the second most expensive spice, second only to saffron because of the intensive labor and time that is required to produce a crop.
- Because of the high cost of natural vanilla, synthetic vanilla is often used in foods, drinks, and also pharmaceuticals. A compound called vanillin is the main component in vanilla extract, and synthetic vanillin has been developed as an alternative to natural vanilla.
- Natural vanilla flavor is produced when vanilla beans are dried and cured by steaming and fermentation.
- In 1836, it was found that the melipona bee, a tiny bee that is endemic to Mexico, is the sole pollinator of the vanilla plant. Outside of Mexico, commercial plants need to be pollinated by hand.
- The vanilla flower lasts less than a day (approximately 8 hours), so time is of the essence when it comes to pollinating!
- The vanilla orchid is a vining plant, unlike the vast majority of other orchid plants.
- The vanilla plant is considered a semi-epiphyte. This means that it can grow as an air plant on a tree, or terrestrially in the soil as well.
- Vines can grow 100 feet or more outdoors, but will be much smaller indoors.
HOW TO GROW VANILLA ORCHID
If you want to eventually grow your own vanilla bean pods, here are some important considerations and care tips for your plant.
1. LIGHT
Indoors, this tropical plant requires at least half a day of direct sun. An unobstructed Eastern or Western facing window works well. Despite what you may have read in some sources, some direct sunlight is very important indoors for the best growth.
My own vanilla orchid was growing indoors in front of an Eastern facing window for a few years before I moved it into my greenhouse.
If you live in an area with very strong sun, you may want to avoid mid-day sun, but otherwise, even your sunniest window would work very well.
Assuming your plant has reached blooming size, without sufficient bright light, your vanilla orchid will refuse to flower, so if you have complete shade indoors, it is probably best to avoid growing this plant if you’re hoping for flowers one day.
Your vanilla vine will greatly benefit from spending the summer months outdoors and will reward you with more vigorous growth. Just be sure that you harden off your plant properly so it doesn’t burn outdoors.
2. WATERING
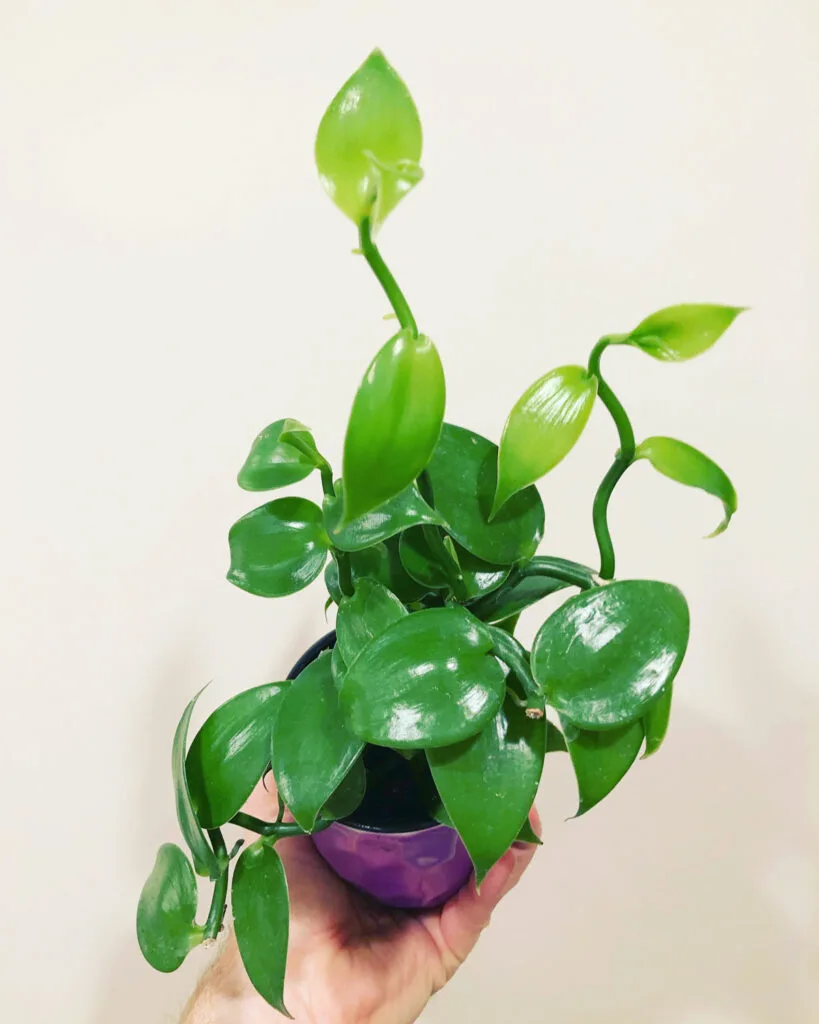
Vanilla orchids need sufficient moisture in order to grow well. Do not allow them to dry out completely for too long.
Do allow the potting medium to dry out a bit before watering again thoroughly though. I would recommend letting the top quarter of the potting mix to dry out before watering thoroughly again.
This will go a long way in helping to foster a healthy root system.
And while you’re at it, if you see any aerial roots on the plant (they will eventually grow), mist those exposed roots as well so that they don’t shrivel up.
3. POTTING MEDIUM
There are many different potting media that you can use for growing your vanilla orchid plant, and while many orchids can grow in plain orchid bark, you should avoid this for your vanilla orchid because it simply doesn’t hold enough moisture.
When I first got my small plant, it was growing in sphagnum moss. When I repotted it, I changed the growing medium.
I’ve had success with equal parts all-purpose potting mix, orchid bark and perlite. This provides sufficient moisture retention, while allowing plenty of air to the root system as a result of the chunky structure of the potting blend.
4. POT TYPE
You can use any kind of pot, but I’ve had best results with terra cotta pots. The porosity of terra cotta pots will great diminish the risk of root rot for these semi-epiphytic plants.
It becomes especially important as you go into larger pot sizes.
5. SUPPORT STRUCTURE
The Vanilla orchid is a vining plant and it will grow very large, so this is definitely not a plant for small spaces. From pretty early on, you should provide a support structure, and as it grows, you’ll need a pretty large one.
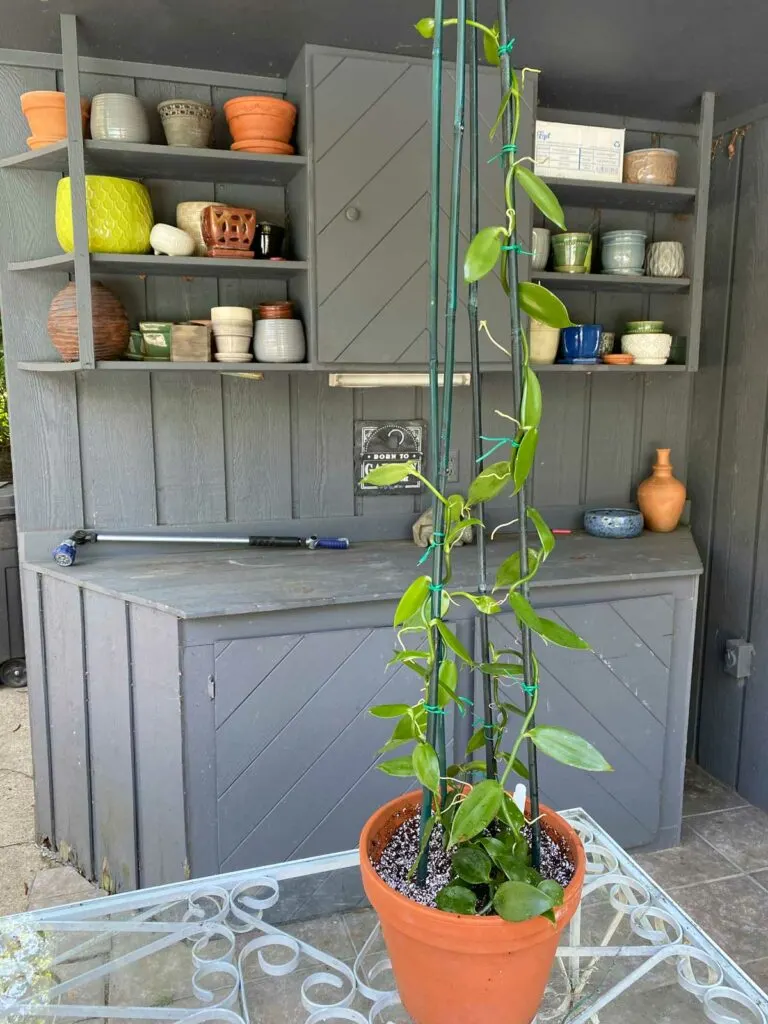
My own plant started off with a single bamboo stake as a support structure. As it grew taller, I made a tripod out of longer bamboo sticks as you saw in a previous photo.
Then finally, when I got my greenhouse, I made an 8-foot tall square climbing structure out of bamboo. I used 4 thick, 8-foot-long bamboo posts for the corners, and then cut pieces of bamboo to make horizontal rungs.
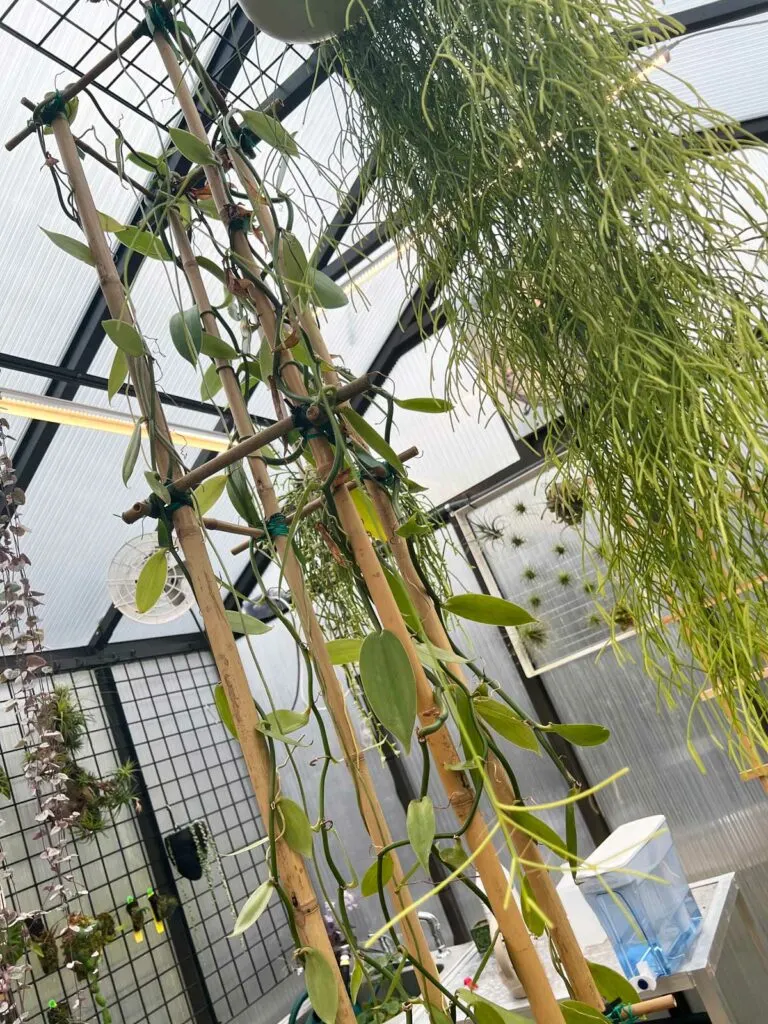
I trained them by loosely tying the vines, but then their aerial roots will start to grow and attach to the supports. After the plant grows all the way up the support, the vines will trail down. Once they reach the surface of the soil, you can train them back vertically upwards.
You can also train your vanilla orchid to grow around the perimeter of your room or greenhouse, assuming that you have enough light.
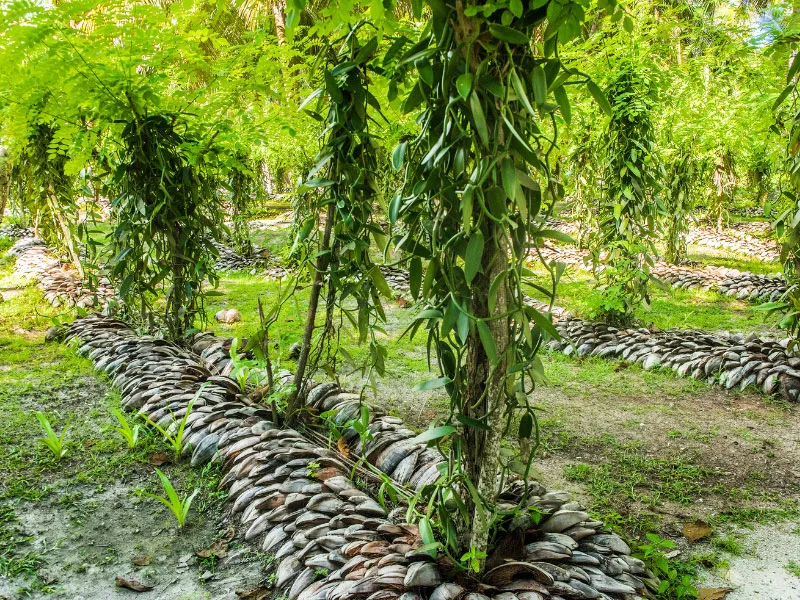
In nature, plants will start growing at the base of a tree. They will attach themselves to their host trees via their aerial roots, and start rambling all over the trunk and branches.
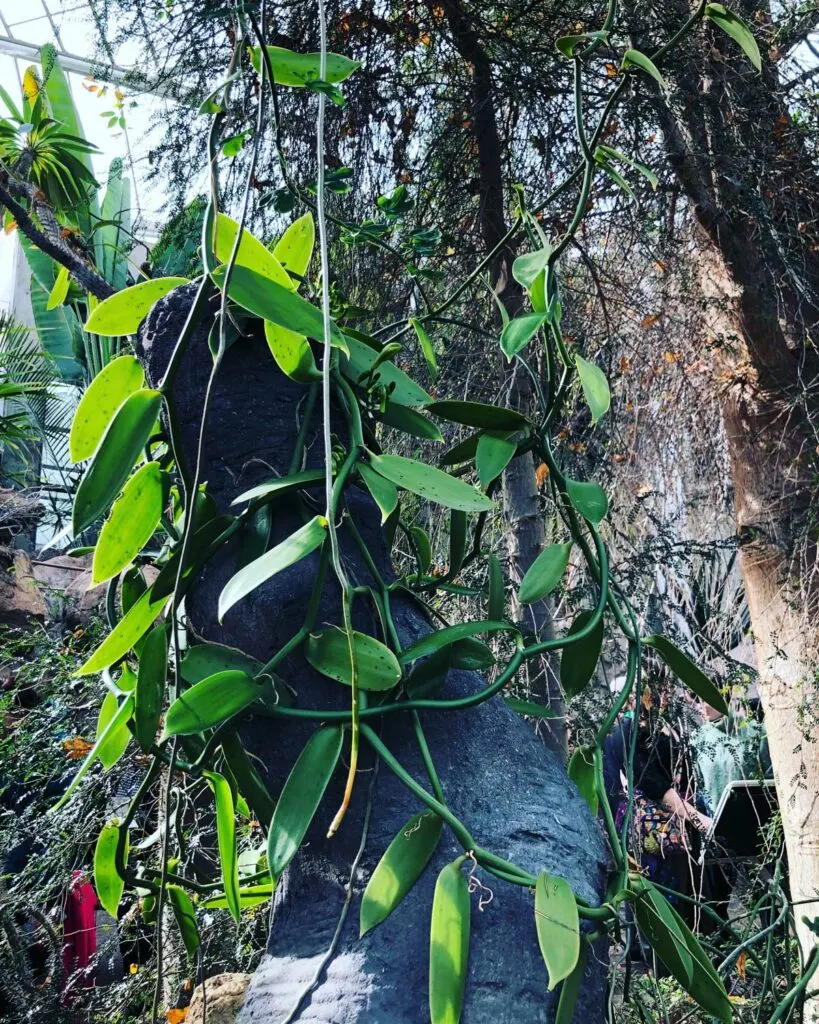
6. FERTILIZING
The recommended fertilization for vanilla orchid is light, but consistent throughout the growing season.
I use Dyna-Gro Grow (link to Amazon) which has a 7-9-5 NPK ratio. I use 1/4 to 1/2 teaspoons per gallon of water at each watering.
In the dead of winter when my plant is not growing much, I’ll refrain from fertilizing until warmer temperatures and more light return as days get longer in late winter to early spring.
I use Dyna-Gro Grow for all my indoor plants and have seen a wonderful difference in their health and growth!
7. TEMPERATURE and HUMIDITY
Warm temperatures and high humidity are a must for growing the vanilla orchid!
The absolute bare minimum temperature is 55°F (13°C), though a minimum of 60°F (16°C) is better. Vanilla orchids suffer with cooler temperatures and can develop yellow leaves and potential root issues.
Growing temperatures of 70-90°F (21-32°C) are ideal and will be most beneficial for growth and development.
Plants will benefit from high humidity, and this will also keep the aerial roots in good condition.
The only practical way to increase humidity is to use a humidifier in the home, or if you are a greenhouse owner, maintaining high humidity is no issue.
Indoors, since these plants climb and get very large, a humidity tray or pebble tray really isn’t practical.
8. AIR CIRCULATION
Like any orchid species, good air circulation is important for your plant’s health for good growth as well as to help avoid fungal diseases. A gently circulating fan should do the trick.
9. PROPAGATION
The orchid nursery Carter and Holmes recommends propagation by cuttings, but only from plants that are at least 20 feet or more in length.
The sap from the vanilla vine stems or roots can be irritating to your skin, so wear gloves when making your cuttings. If the sap has contacted your skin, be sure to wash your hands with soap and water.
Carter and Holmes has a great guide with pictures showing exactly how to propagate your vanilla orchid cuttings.
10. VANILLA ORCHID FLOWERS and SEED PODS
Vanilla orchid plants will flower after 3-4 years or so, but only under ideal conditions. Indoors, they would often take longer, and may never even flower indoors unless they’re happy. If you can grow your plant in a warm, bright greenhouse, you will greatly increase your chances of flowering and fruiting.
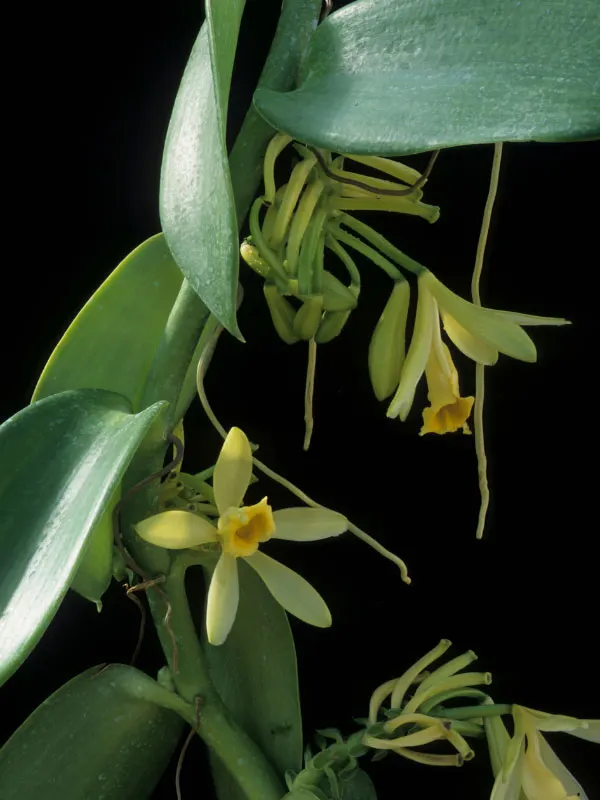
Here are some interesting tidbits to consider concerning getting your plant to flower:
- Plants usually need to get very long before they start to flower, often even 30 feet or longer.
- A dry period of a couple of months in the winter months is important to initiate flowering, assuming the plant is of mature size. In its natural habitat, flowering takes place typically around April and May near the end of the dry season.
- The fragrant flowers have only a light scent, and they appear only once a year over a period of about two months.
- It is said that if your vanilla orchid vine climbs up your support structure and starts to cascade off the top of the support, this will help to encourage flowering.
- Multiple flowers will emerge from the leaf axils, with each individual flower lasting only about 8 hours or so.
Check out an article by the American Orchid Society on pollinating vanilla orchid flowers as a starting point. You’ll need to hand-pollinate your flowers otherwise your plant will not produce any vanilla beans.
Pollination is typically done with a toothpick. It is tricky because you have to lift the rostellum so that the anther can then be rubbed against the stigma.
If the pollination was successful, the skinny vanilla bean pods will start to grow over the next couple months or so. The pods will stay on the plant for at least 8-9 months.
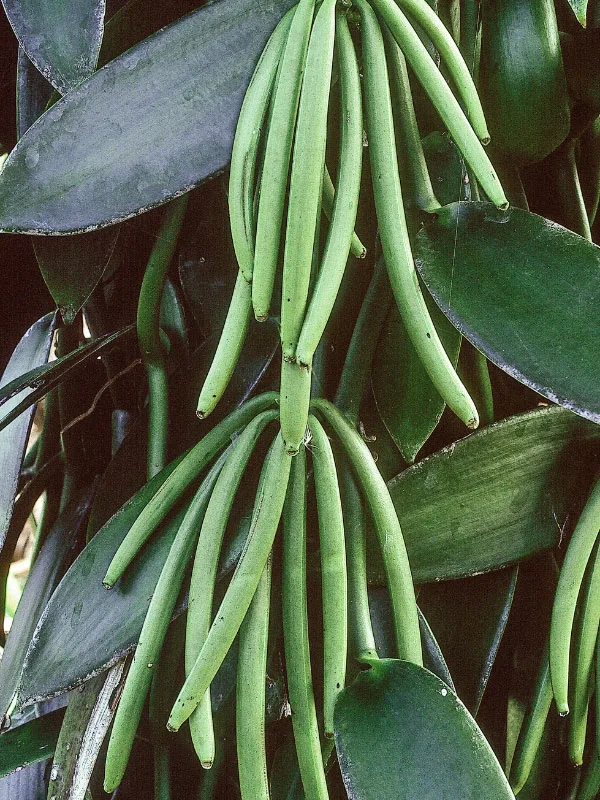
Each skinny fruit pod reaches about 6-9 inches in length
After the pods are picked, you’ll have to cure the vanilla beans.
I hope you’ve enjoyed this post on how to grow vanilla orchid. Do you have a vanilla orchid? Comment below. I’d love to hear!
Posted on Last updated: March 29, 2023