Celosia plant
Sow seed in early spring in a heated propagator with a temperature of 20-25°C. Sow in moist seed compost mixed with a third by volume of perlite, covered with a thin layer of the same mixture.
How to grow celosia

All you need to know abut growing celosia, in our Grow Guide.
With vivid colours and showy, plume-like or crested flowers, celosia is immensely decorative for indoors or the summer garden, producing blooms from midsummer to early autumn. Celosia is frost-tender and is best treated as an annual. Vivid flower colours include orange, pink, red and green. Its distinctive appearance and unusual flowers tend to put celosia in the ‘love them or hate them’ category of plants.
Celosia also makes an excellent cut flower and is particularly popular in Japan, where a number of varieties have been developed for that purpose. Dried celosia blooms keep their colour for at least six months. Celosia height ranges from 30cm to 1m, depending on the variety, with flower heads that can be up to 30cm long.
There are two distinctly different types of celosia: Celosia plumosa is known as plume flower, plume of feathers and Prince of Wales’ feathers, due to the upright and feathery shape of its blooms. Celosia cristata is known as cockscomb for its compressed, unusually shaped, and contorted blooms.
How to grow celosia
Buy ready-grown plants in early summer or raise your own from seed sown in spring. Grow in a warm, sheltered site that gets sun for at least half the day. Keep the compost evenly moist and feed while in flower. Discard and compost plants once flowering has finished.
Where to grow celosia

Celosia make good indoor plants pots in a protected spot such as a conservatory, porch, or greenhouse, but preferably not in centrally heated rooms. Grow outdoors in pots or in the border from early summer to the frosts. Celosias look best in groups or drifts, and make good companions to other brightly coloured plants with an exotic appearance, such as Canna lilies and tender salvias.
How to plant celosia

Celosias that are bought in small pots may need potting up into a larger container and growing on before planting out. Use a good quality, peat-free multi-purpose compost and ensure the top of the root ball is level with the surface of the compost. To grow celosia outdoors, first harden off plants (acclimatise to the outside) for at least two weeks before planting out well after the last frosts.
More like this
How to care for celosia

Water to keep the compost evenly moist at all times but take care not to overwater. Feed with a liquid fertilizer once every 10-14 days whilst in flower.
Cut off faded flowers to keep the plant tidy and encourage more blooms to be produced.
How to propagate celosia
Sow seed in early spring in a heated propagator with a temperature of 20-25°C. Sow in moist seed compost mixed with a third by volume of perlite, covered with a thin layer of the same mixture.
Celosia seedlings dislike root disturbance so the seed is best sown in modular trays or individual pots that can be transplanted with the root ball intact, or in biodegradable pots that can be planted intact.
Growing celosia: problem solving
Celosias growing under cover are more prone to pests than those growing outside. Be vigilant and check regularly for pests, particularly whitefly, which can be combatted using a biological control.
Celosia is prone to problems if overwatered, so keeping the plant moist but not wet is key to success. Symptoms of overwatering are yellowing foliage, rotting stems, or collapsing growth. Again, be vigilant as once plants get to the wilting stage, they are unlikely to recover.
Advice on buying celosia
- Celosia seed is available both as individual colours in named varieties, or as mixtures
- Celosia plants are often available in nurseries and garden centres, usually sold alongside indoor plants rather than in the garden plant sections
- Avoid buying celosia plants that have been stored near an open window or door – they may be damaged beyond repair
Where to buy celosia
Celosia
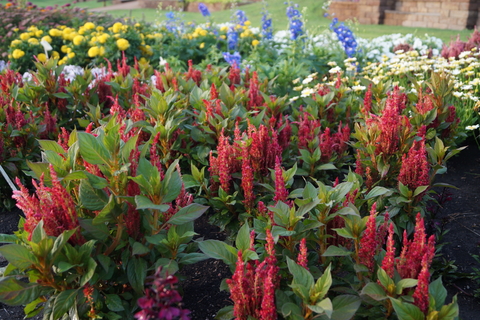
Celosia is a member of the amaranth family and is a very common plant in Minnesota annual gardens due to their ease of care and wide array of flower structures and colors.
The name Celosia originates from the Greek word for “burning” due to the flame-like flower heads. The species used for flowering annuals is believed to be native to the Mediterranean region or East Africa and also commonly known as “woolflowers”.
Leaves of this plant are edible and have a spinach-like taste while the plant is young but after flowering, the leaves turn bitter.
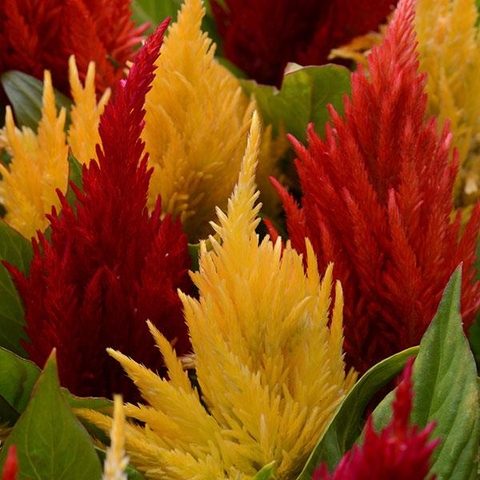
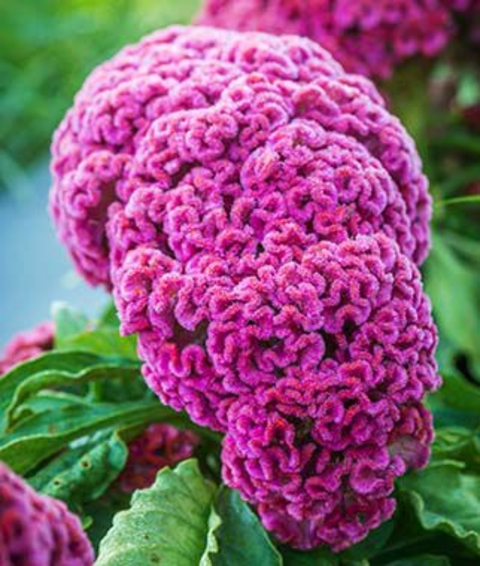
There are three distinct types of Celosia based on flower structure: plumed, wheat and cockscomb.
- Plumed cultivars have multiple flower stalks and blooms with a feathery appearance. They are often between 8 and 24 inches tall.
- Wheat cultivars have a singular flower stalk and are similar looking to the head of a grain crop. These cultivars are often between 12 and 36 inches tall and are the most limited in colors compared to the plumed and cockscomb varieties.
- Cockscomb cultivars have coral or brain-looking blooms that are often large and heavy so they must often be staked. They grow between 12 and 36 inches tall.
Recommended varieties
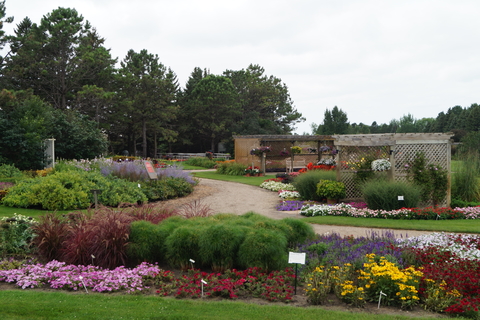
Annual celosia are evaluated as part of the U of M flower trials and research. Located at the WCROC in Morris, MN, the Horticulture Display Garden serves as an All-America Selections (AAS) Display Garden and Trail Grounds and provides the public an opportunity to view the newest superior performers.
The following annual celosia cultivars were rated good to excellent in our recent trials:
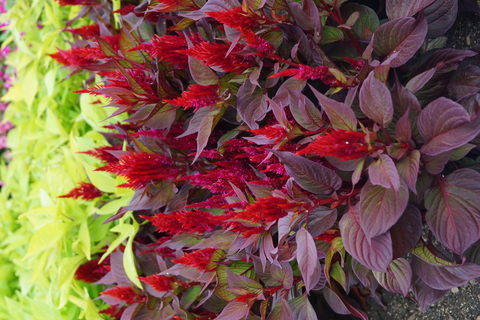
- Asian Garden
- Smart Look Red
- Prestige Scarlet
- New Look™
Growing outdoors
Celosia perform best in garden beds and will often be stunted if grown in containers. They can be planted outdoors once soil temperatures are above 55 degrees Fahrenheit. Plants should be spaced about 8-12 inches apart depending on cultivar. These are the following requirements for choosing a site for celosia:
- Must have full sun for 8+ hours a day. They perform best in a very warm location.
- Soil must be well drained. To improve drainage, compost or sand can be incorporated into heavy soils.
- Celosia prefer soils with a pH of 6-6.5 with a high organic matter content.
A general-purpose fertilizer with equal amounts of Nitrogen, Phosphorus, and Potassium should be incorporated into the soil at time of planting. After planting, celosia should be fertilized monthly using a fertilizer with a higher phosphorus than nitrogen content to promote new blooms.
Celosia require regular watering but do not overwater as they can tolerate dryer soil better than overly wet soil and too much water can kill the plant. Only water when the top 1-2 inches of soil are dry.
Pests and diseases are usually not an issue with this plant.
Other tips for abundant blooms and healthy plants:
- Stake taller cockscomb varieties to prevent the stem from breaking as the large flower head develops.
- Removing old blooms from the plant will promote the production of new flowers.
- Keep the soil surface clean to prevent the growth of disease.
Starting seeds indoors
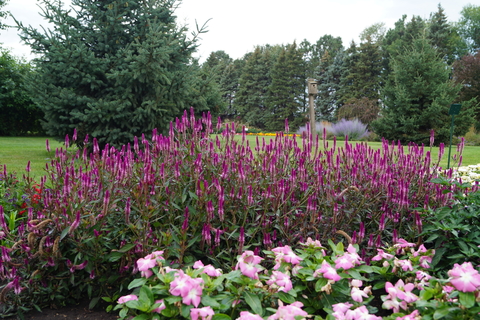
Celosia seeds can be started indoors about 10 weeks prior to the anticipated outdoor planting date. Use a growing media specifically designed for germinating seeds. Follow these guidelines for successful seed propagation:
- Plant ¼ inches deep and cover with vermiculite.
- Keep the seed and media moist by using a plastic cover over the seeding tray.
- Seeds will germinate in 7-10 days at 75-80°F
- After germination, grow plants at 70-75°F during the day and 65-70°F at night.
- Celosia seedlings are very susceptible to dampening off so let media dry out slightly between waterings.
Flower displays
Celosia are often used in cut flower displays, both fresh and dried. To keep fresh cut flowers displays looking their best, be sure to change the water every two days. To dry celosia flowers, hang them upside down for two weeks.
Celosia propagation
Celosia are easily propagated via cuttings as well in about 3-4 weeks. To do this, cut 4-6 inches off the top of the plant and then remove the leaves off the bottom half of the cutting. Place the cutting in enough water to cover where the leaves were removed. Once roots begin to grow, it can be transplanted into soil.
Author: Nate Dalman, West Central Research and Outreach Center